+ Spanish
Have you managed to rot your orchid’s roots? We all have at least once as beginners!! Don’t beat yourself up, it’s part of the training process :). Sometimes, there’s still hope and you can save your rootless orchid!! Here is how you can promote the growth of new roots:
Shpag n’ Bag Trick
First of all, les consider your plant’s needs. Your orchid need water to survive. Water provides the turgor pressure that the tissue and cells need, it’s a chemical compound that is used during the productions of sugar in the photosynthesis process and it also helps the plant to controlling the osmotic pressure of the ions inside and outside the cells. So, how can your plant absorb water if there it has no roots?
*Turgor pressure is the outward pressure that occurs in a plant cell when the cytoplasm and vacuoles fill up with water and the cell membrane pushes against the cell wall.
When we hit the critical point of having no roots, increasing the Relative Humidity is of little help, because the plant is not able to absorb enough water through the leaves. We need to maintain the RH in very high levels for two reasons: water in the form of vapor is absorbed easily by the tissue and because an environment saturated with moisture prevents the plant from drying out even more while trying to develop new roots.
What we are going to do with the Sphag n’ Bag trick is use some soaked sphagnum moss to provide humidity and a plastic bag to create a mini greenhouse in which the relative humidity level is kept very high.
Important note: the plant should NOT be in contact with the soaked sphagnum moss!
We’ll do this trick in 2 fases:
A) Preparing the plant:
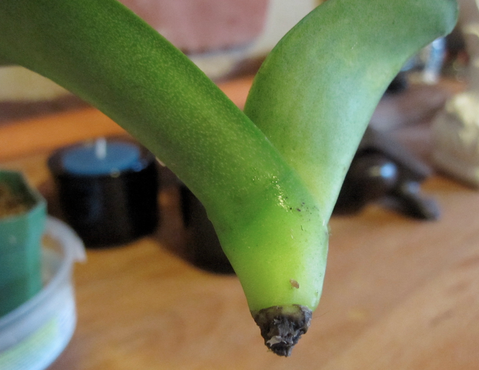
 Remove any organic media attached to the base or any root left. If it seems imposible to do, don’t tear it off, see step 5!
- As always, use disinfected tools tu cut and then cauterize all damaged or death roots.
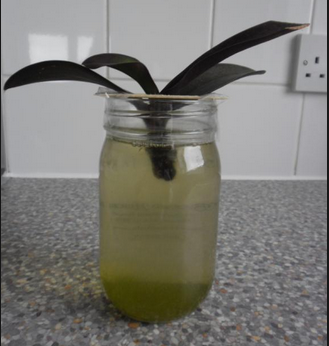
- Add a teaspoon of rooting hormones to a galón of warm water; some examples of rooting hormones are K-L-N, SuperThrive, MegaThrive, etc. Don’t add fertilizer to the solution because it may drain the water from the plant while performing it’s process.
- Soak the base of the plant for at least one hour and rinse with running water.
- Remove aun remaining media; now it should be easier since the media should be soft after the soaking.
- It’s a good idea to spray lightly with some disinfectant, like our multi purpose spray (see Home Remedies) to prevent the formation of mold or mildew.
B) Preparing the mini greenhouse:
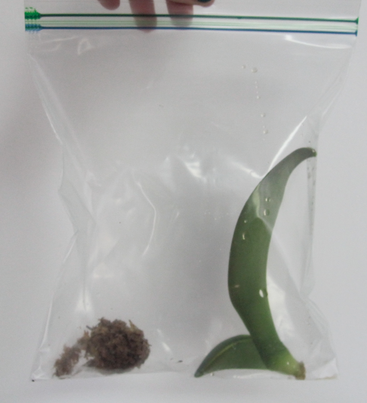
- Use a plastic bag big enough to put the plant in it loosely.
- Place a little ball of soaked Sphagnum moss in one corner of the bag. If you can’t find moss, you can use a cotton ball or a piece of cloth, but you have to make sure to constantly soak it to keep it wet, several times a day.
- Place the plant inside the bag in it’s normal growing position, you can help it with plastic tutorials or plastic chopsticks (don’t use wood ones, they will rot). Make sure the plant is NOT in contact with the Sphagnum moss or any water deposit.
- Close the bag. If you can fit your plant into a Ziploc bag it’s easier, if you need a bigger bag, then fold the opening several times and use hanging clips to keep it closed.
- Place your mini greenhouse in a warm area with good light, but never in direct sunlight. Forget about it for a few weeks!!
Placing this mini greenhouse in a warm and lighted area is vital. The heat will induce new root growth and the partial shade (not direct sunlight) will moderate new foliage growths, like new stems or new leaves; this way, the energy of the plant will focus mostly on root development.
Besides, heat will produce more humidity inside the bag and the shade will avoid the bag from becoming a cooking pot.
*If your zone is really hot and the humidity levels increase too much forming drops of water that drip in the bag, make a couple of holes and let some of the RH escape through them.
In a few weeks, you should have new root growths. When your plant has 3 or 4 roots, each 1.5″ long, you can take it out, repot it and continue with normal care. If you have doubts, please read our article “How should I water my orchids?“
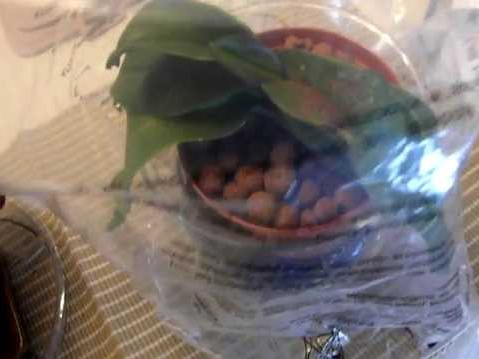
If you’re growing in semi hydroponics: prepare the plant the same way, repot it and place it in the bag, pot an all. Or, you could place the bag upside down covering the plant and the pot. It’s an easier way to have a mini greenhouse and you won’t stress the plant repotting it later!!
check out our store!!
(click on the image)